Portainer 사용하여 immich 설치 방법

- docker 폴더에 'immich' 폴더 생성
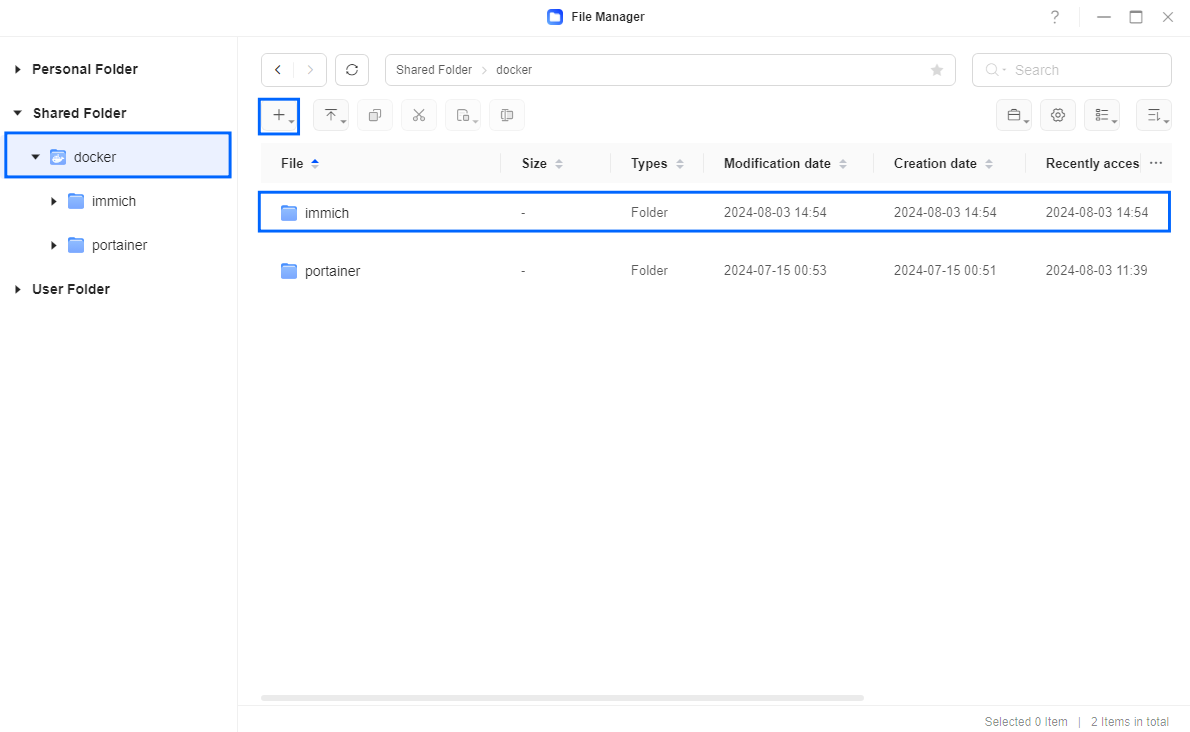
- 'immich' 하위 폴더로 'cache, db, matplotlib, micro, redis, upload' 6개 폴더 생성

- portainer 접속 후 Stack - Add Stack 클릭, 이름 적고 web editor에 하단 본문 작성
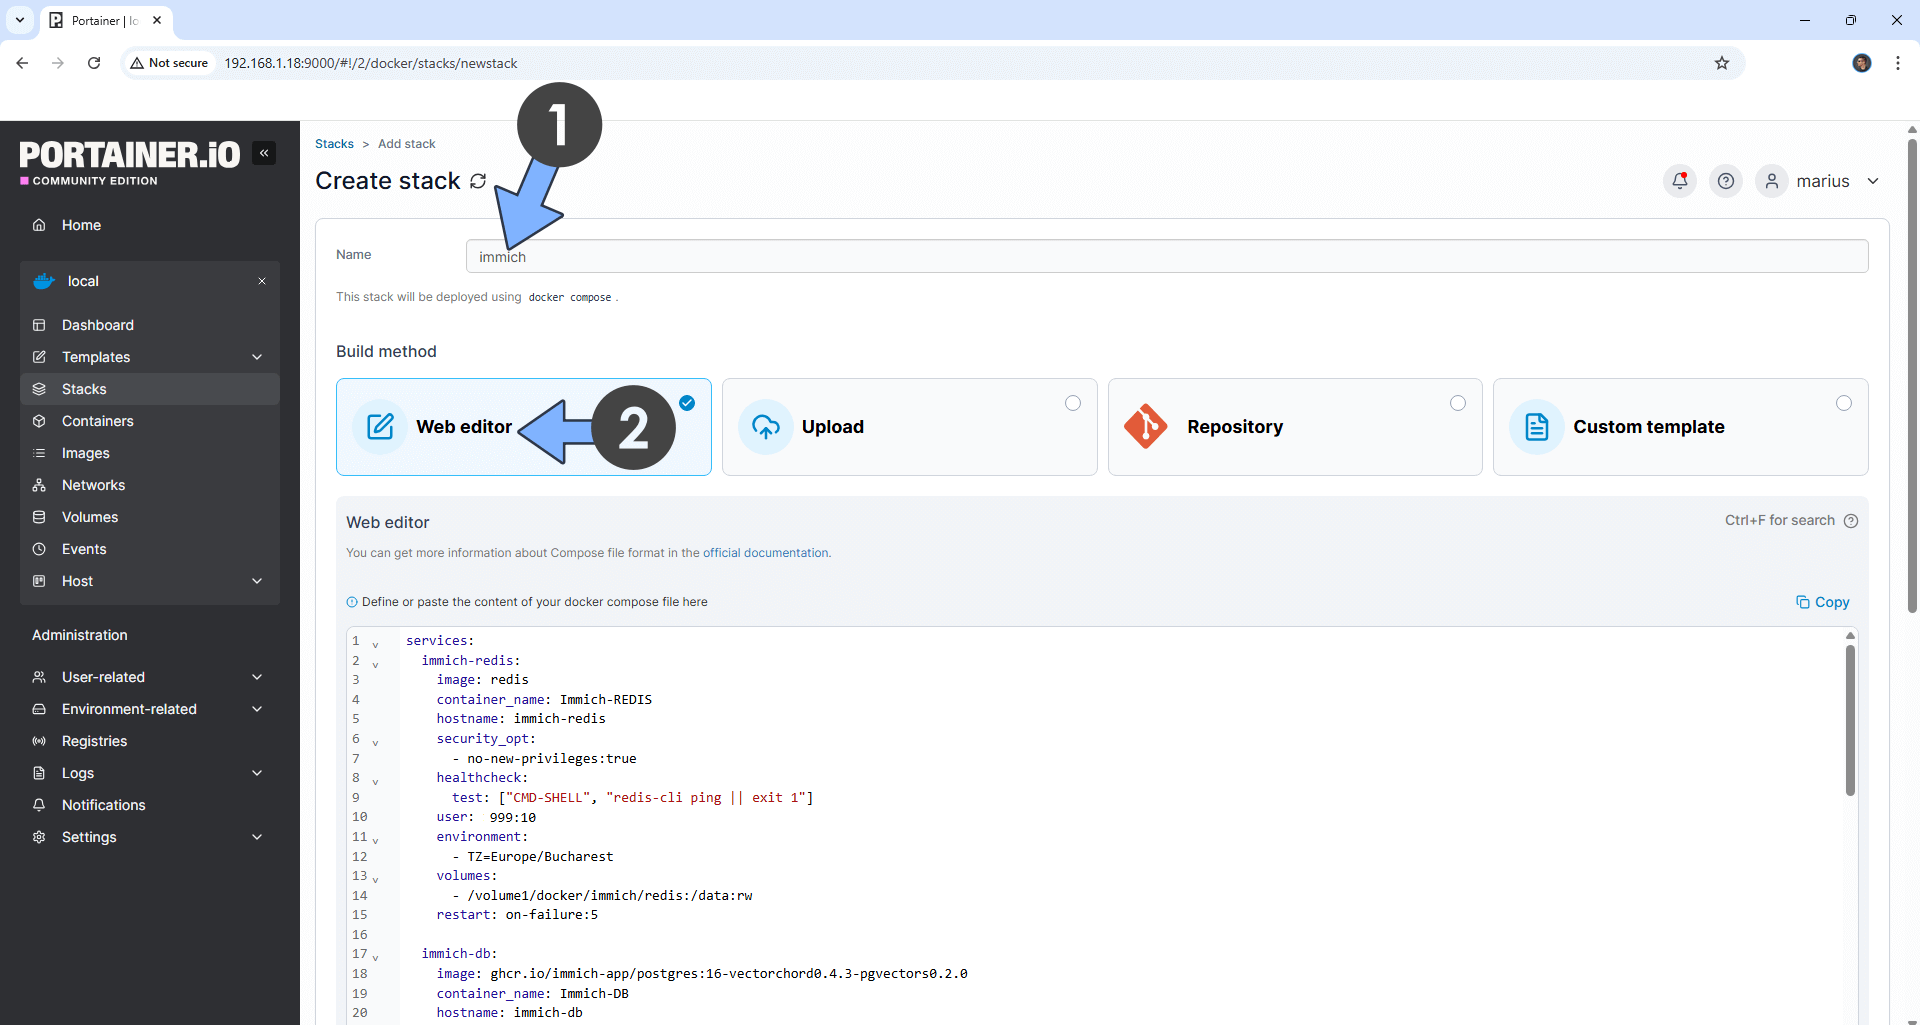
services:
immich-redis:
image: redis
container_name: Immich-REDIS
hostname: immich-redis
security_opt:
- no-new-privileges:true
healthcheck:
test: ["CMD-SHELL", "redis-cli ping || exit 1"]
user: 1000:10
environment:
- TZ=Europe/Bucharest
volumes:
- /volume1/docker/immich/redis:/data:rw
restart: on-failure:5
immich-db:
image: ghcr.io/immich-app/postgres:16-vectorchord0.4.3-pgvectors0.2.0
container_name: Immich-DB
hostname: immich-db
security_opt:
- no-new-privileges:true
healthcheck:
test: ["CMD", "pg_isready", "-q", "-d", "immich", "-U", "immichuser"]
interval: 10s
timeout: 5s
retries: 5
shm_size: 128mb
volumes:
- /volume1/docker/immich/db:/var/lib/postgresql/data:rw
environment:
- TZ=Europe/Bucharest
- POSTGRES_DB=immich
- POSTGRES_USER=immichuser
- POSTGRES_PASSWORD=immichpw
#- DB_STORAGE_TYPE=HDD #Remove the red # in front of the – DB_STORAGE_TYPE=HDD if your database isn’t stored on SSDs.
restart: on-failure:5
immich-server:
image: ghcr.io/immich-app/immich-server:release
container_name: Immich-SERVER
hostname: immich-server
user: 1000:10
security_opt:
- no-new-privileges:true
env_file:
- stack.env
ports:
- 8212:2283
volumes:
- /volume1/docker/immich/upload:/data:rw
restart: on-failure:5
depends_on:
immich-redis:
condition: service_healthy
immich-db:
condition: service_started
immich-machine-learning:
image: ghcr.io/immich-app/immich-machine-learning:release
container_name: Immich-LEARNING
hostname: immich-machine-learning
user: 1000:10
security_opt:
- no-new-privileges:true
env_file:
- stack.env
volumes:
- /volume1/docker/immich/upload:/data:rw
- /volume1/docker/immich/cache:/cache:rw
- /volume1/docker/immich/cache:/.cache:rw
- /volume1/docker/immich/cache:/.config:rw
- /volume1/docker/immich/matplotlib:/matplotlib:rw
environment:
- MPLCONFIGDIR=/matplotlib
restart: on-failure:5
depends_on:
immich-db:
condition: service_started
본문 내 1000, 10를 자신의 UID value, GID value 값으로 변경.
HDD # 지우기
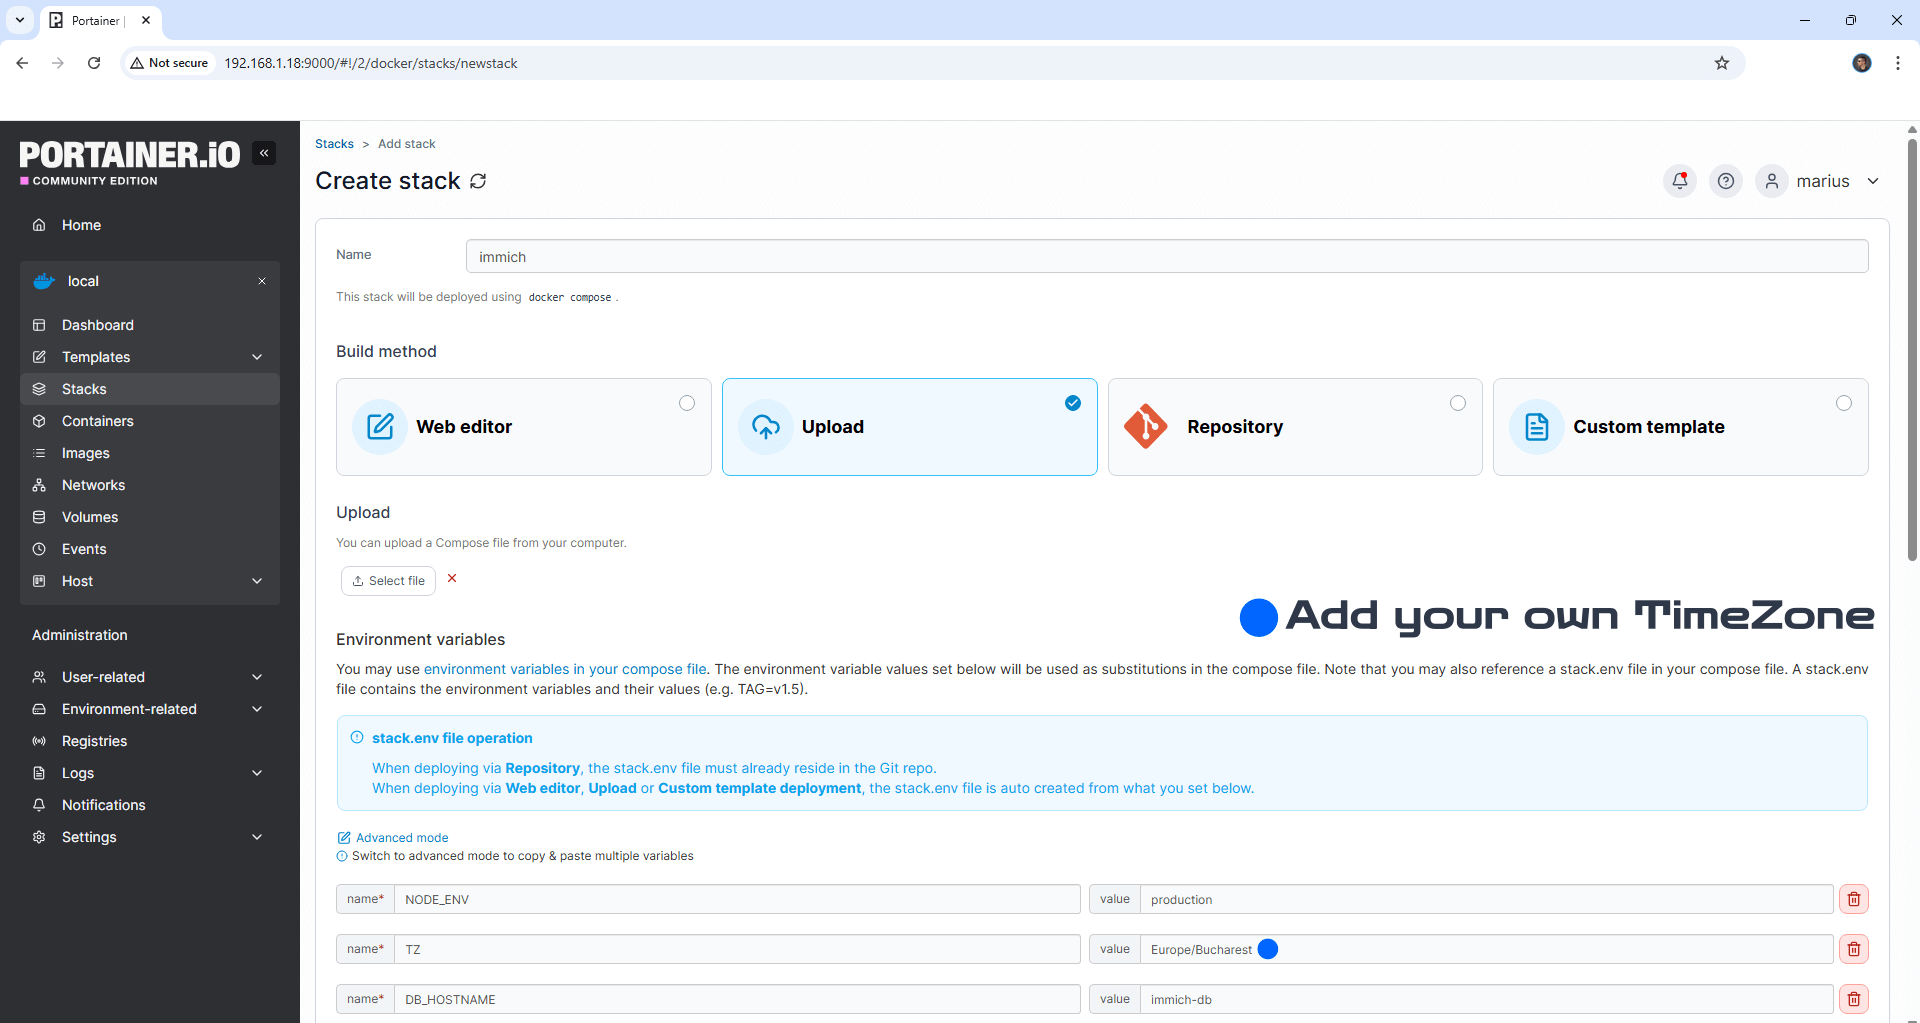
- Upload - Load variables from .env file 클릭. 하단 파일 다운 후 upload.
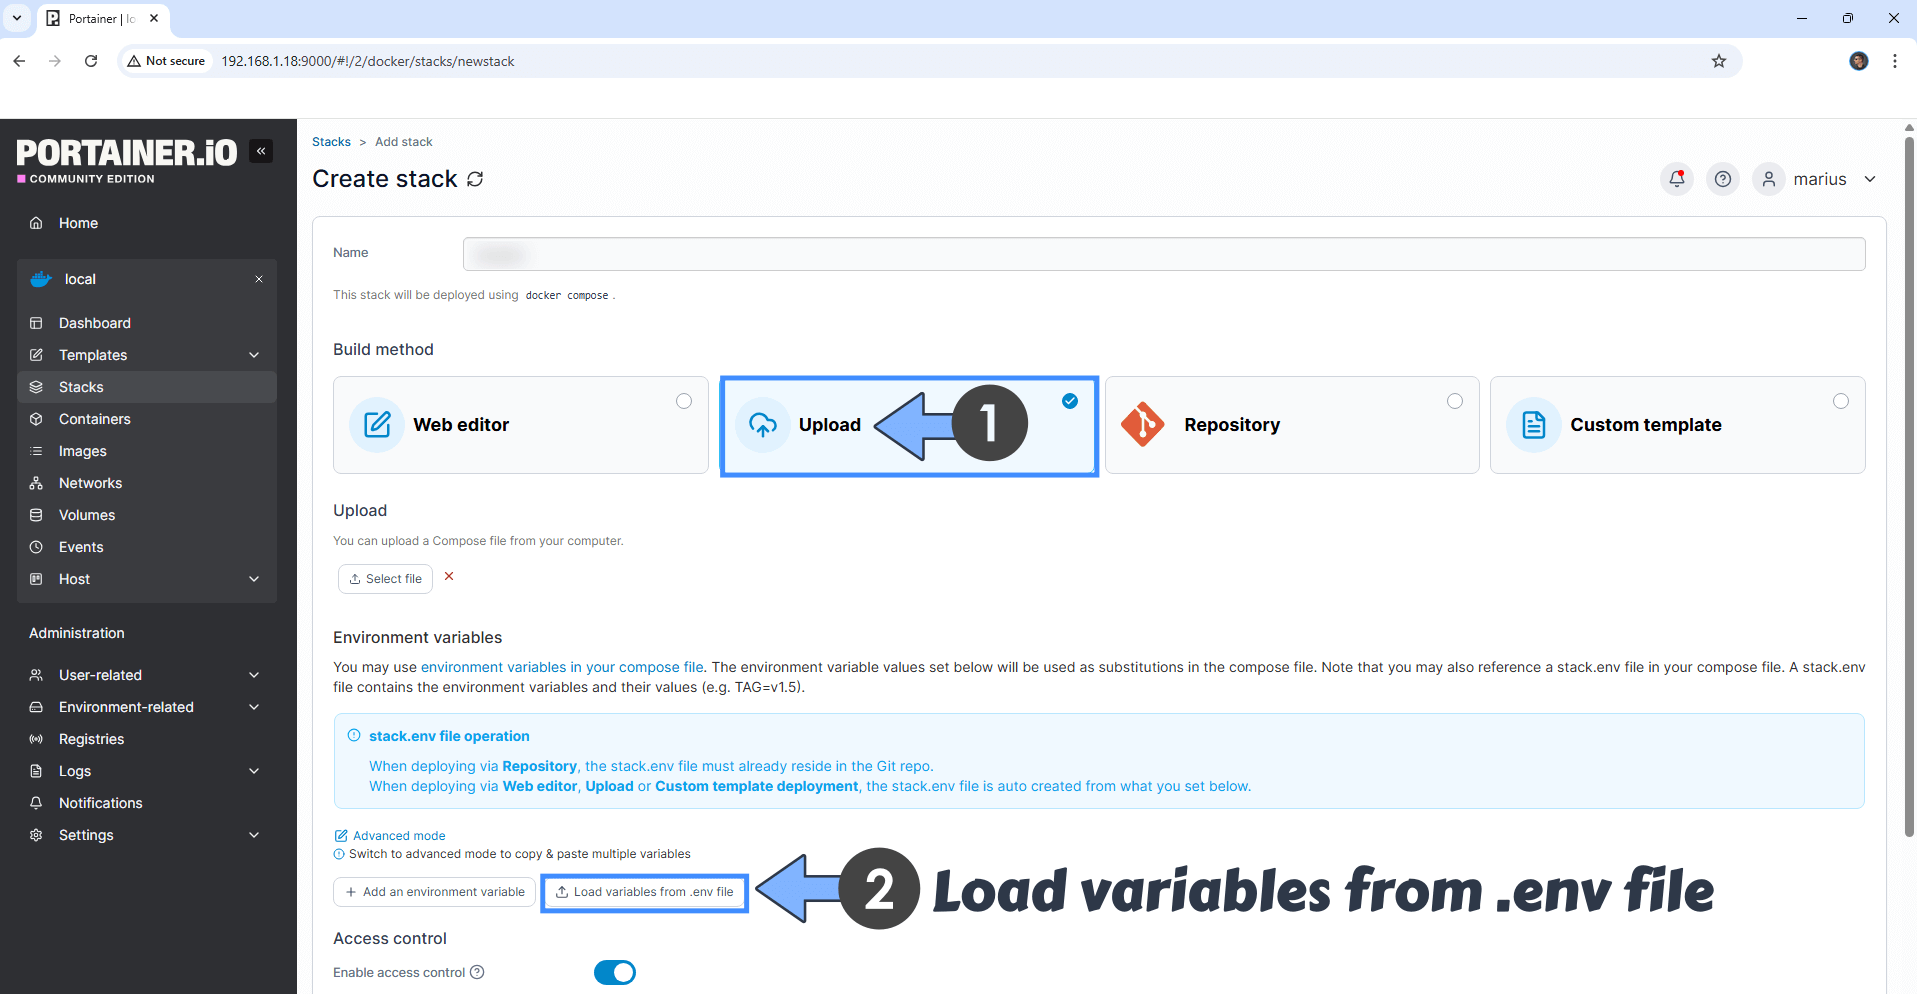
- Time zone 변경. (하단 클릭하여 확인)
- Web editor 로 돌아와서 JWT_SECRET 란에 자동 생성된 128자로 변경. (하단 클릭)
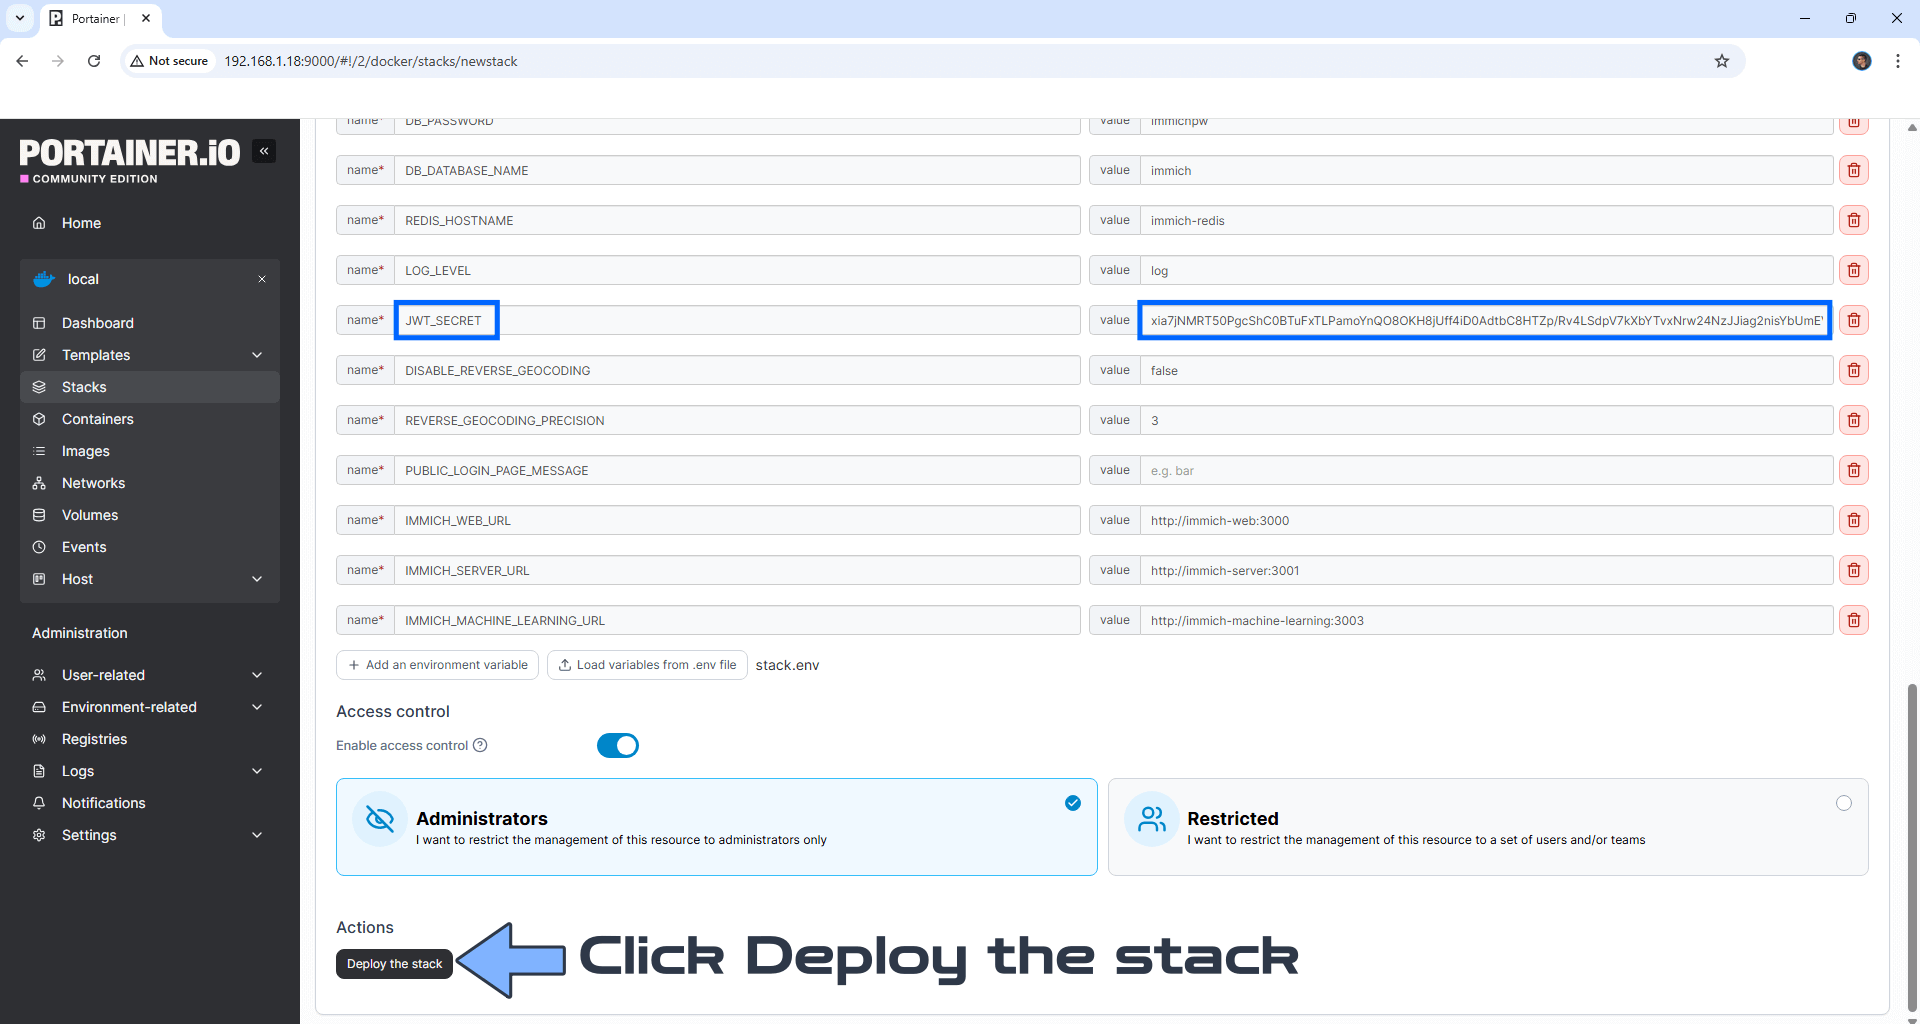
- Click deploy the stack
- http://ugreennas-ip-address:8212